DIY Children’s Room Door Letters: Craft Challenge #1


I was thrilled when Emily from A Pop of Red asked me to join the International Craft Challenge! And thankful. Thankful that the craft challenge focused on stash busting too, given that I have more half started craft projects and craft stuff knocking around the house than I know what to do with! And how totally lovely is it to be part of something international? I’m really looking forward to see everyone’s crafty items.
The idea is, we focus on using up one material from our craft stash and then we all post our craft on 30th of every month. This month, I focused on using up some fabric by making some DIY Children’s Door Letters for the children’s rooms, although I didn’t buy anything and used it from stuff I already had knocking around the house.


I bought the letters a couple of years ago with the view to making some kind of letter gallery in the house (I did have to add an A in though for our newest addition!) But, as usual, the letter gallery never emerged and so instead, I decided to use them as door signs for the kid’s rooms. If you’d like to make your own DIY Door Signs, you will need…….
- Wooden Letters
- Felt
- Glue Gun
- Spray Paint
- Lego, driftwood (optional)
- Cocktail sticks
- I began by spray painting the wooden letters with spray paint. This was a super quick job and was done in no time but the tricky part was trying to decide how to cover each letter.

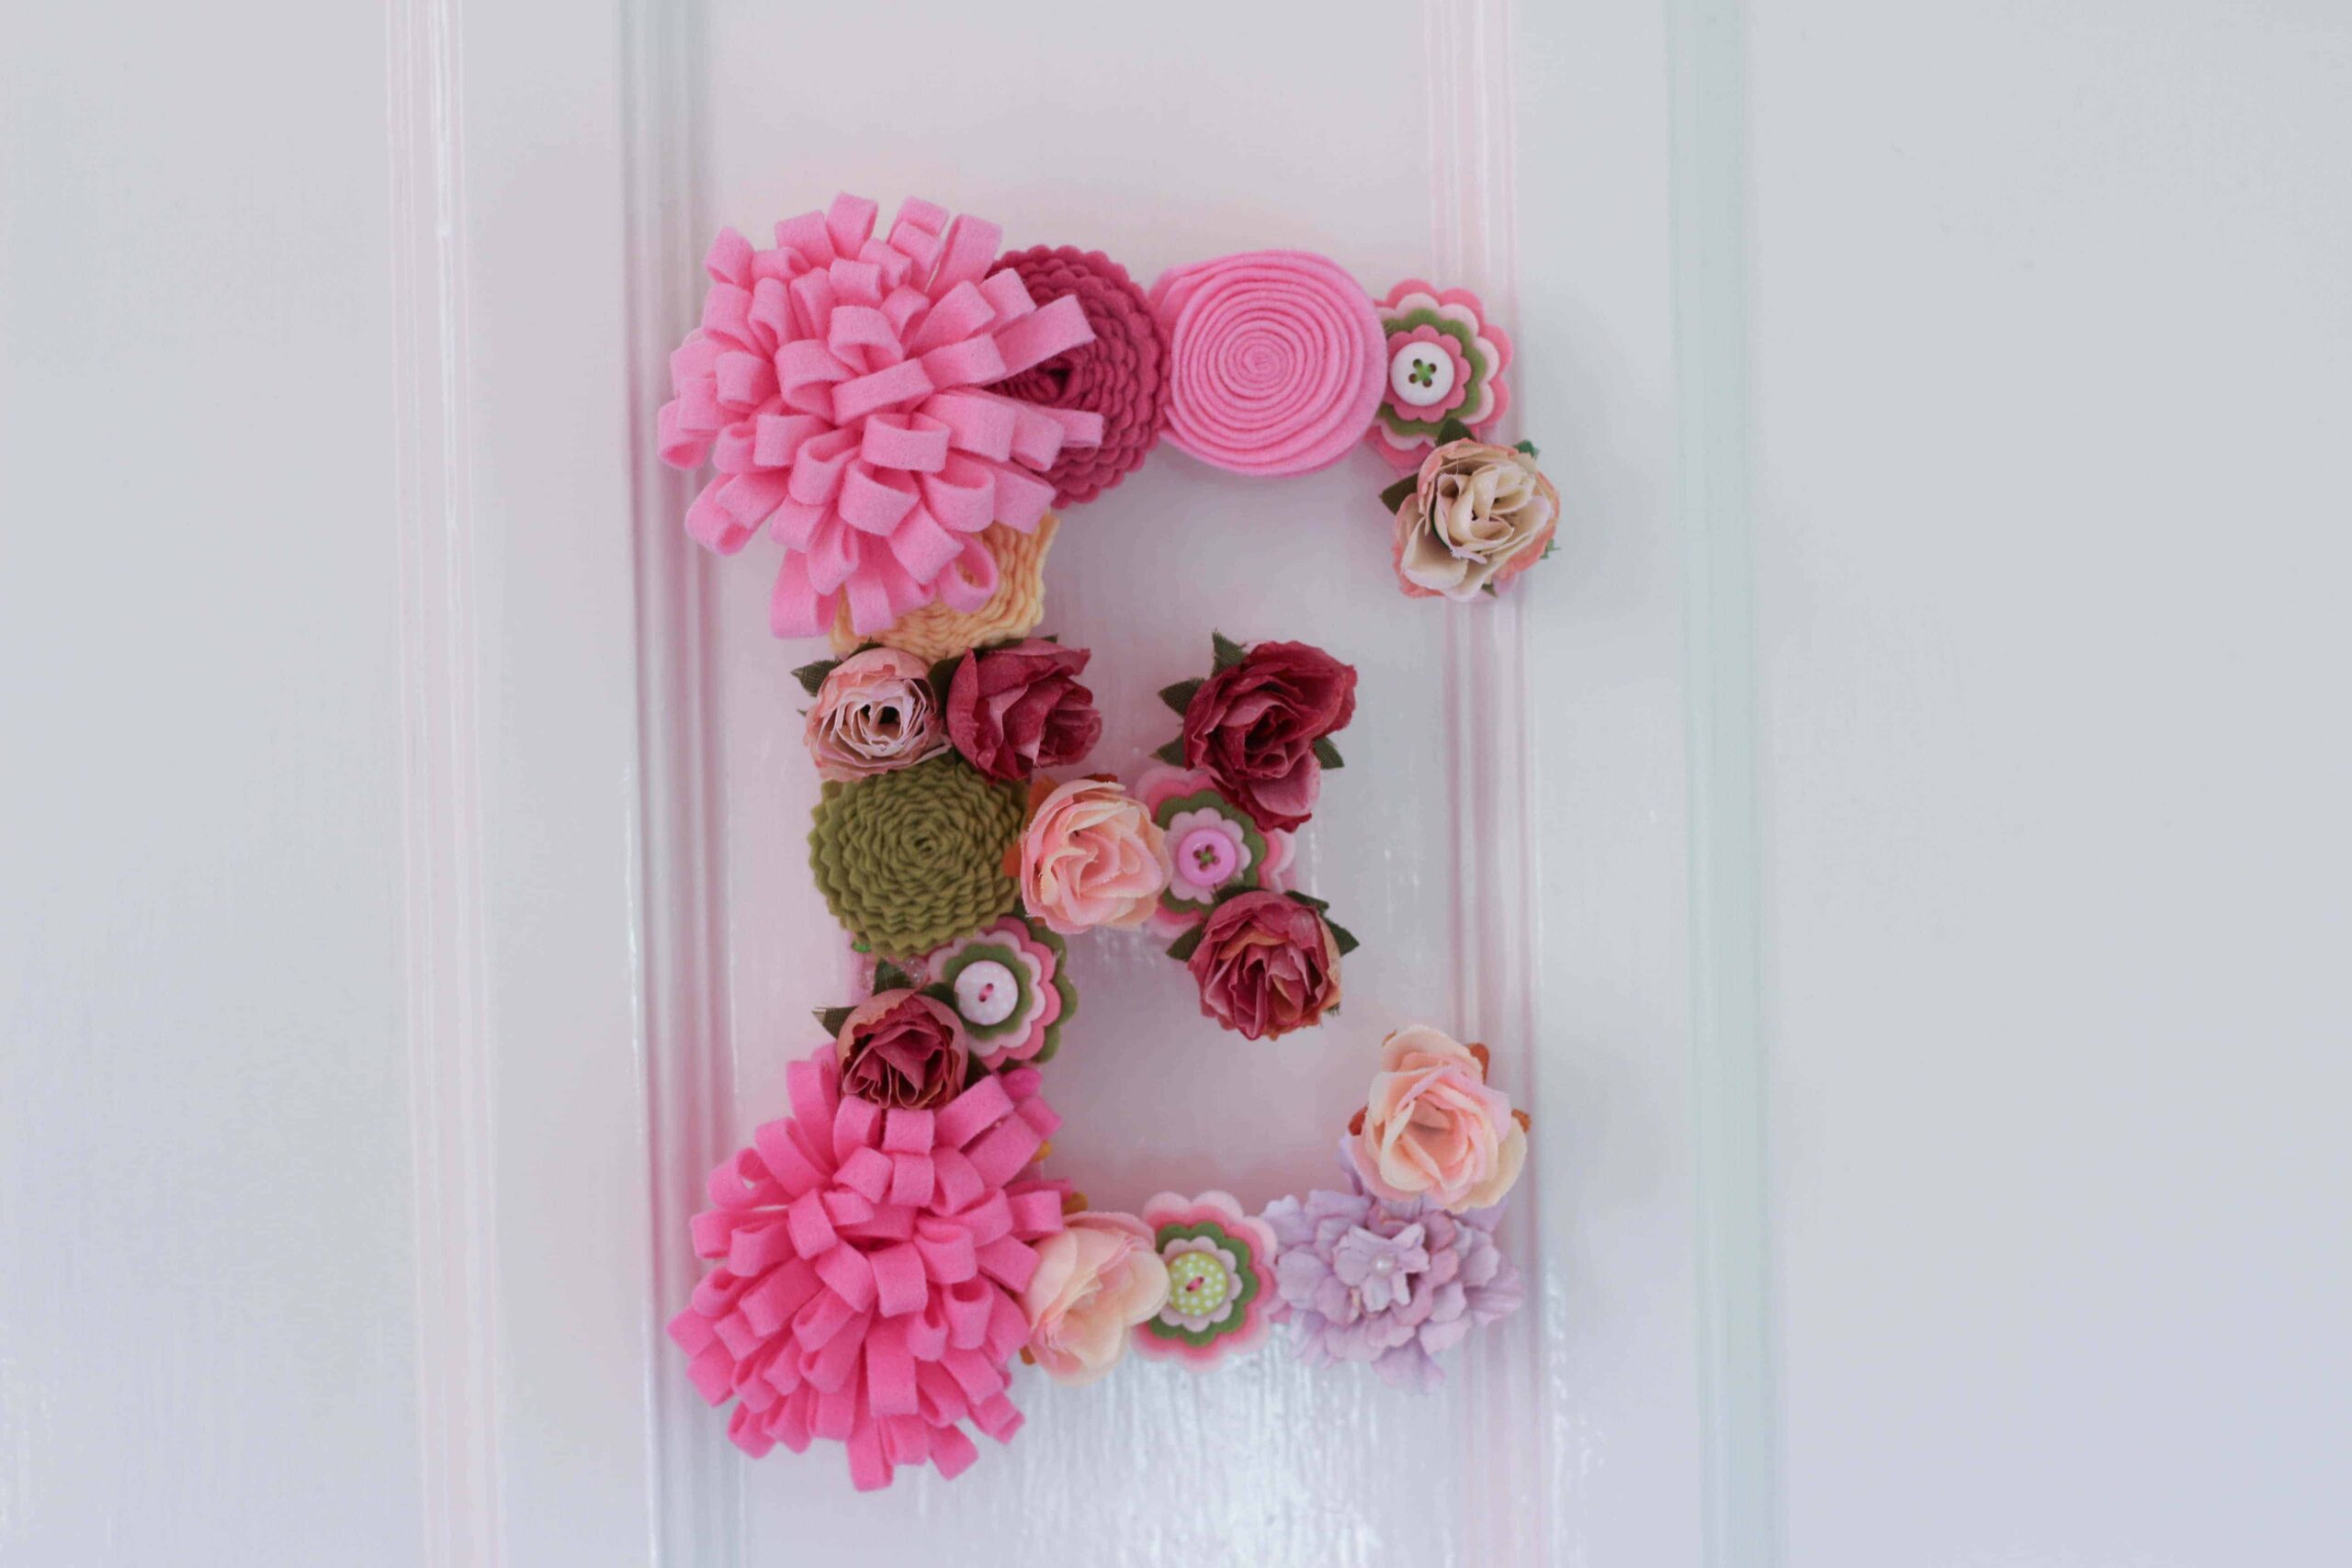
- For the girls door signs, I made fabric flowers from lots of leftover felt I had and paper flowers to cover their letters. The girls LOVE pink so I also used some artificial flowers left over from a friend’s wedding too as I didn’t have quite enough felt. The felt flowers were much easier to make then I expected. Here is a tutorial that I used but the easiest one I made was to roll some felt (about 2 inches wide) up into a tight roll. Glue (with a glue gun) the end of the felt to seal the roll. Cut into the roll of felt, half way down and pull out to separate the pieces and make a flower shape.


- The hardest part of this craft was arranging the flowers, I took forever to decide where to glue the flowers! I filled the gaps with beads and pink buttons then I glued them each into place with a glue gun. I found that you needed to push the together more than I had when I was displaying them, so quickly had to knock up a few flowers!


- For the boys, I spray painted Finlay’s door letter grey (with Pinty Plus Evolution Grey) and glued on lego pieces to make the sign. I had a mini disaster, in that I had a tiny gap which couldn’t be filled with a standard size lego piece! Thankfully, I found one of Finlay’s old kits of lego and that had some flat pieces in that I could squeeze to fill the gap! Panic Adverted!

- For Archie’s sign, I painted his letter blue and then made a simple driftwood boat with a cocktail stick and some white fabric. I thought the boats were so cute that I made several of them, but unfortunately they overshadowed the letter because I realised it’s very difficult to snap driftwood. There was no time for a saw and so I just made slightly larger boats that I’ll have to use elsewhere!

- I just added some simple hooks on the back and we were done!
The kid’s really them and I think it adds some of their individual personalities to their bedrooms. It was only when we went to hang Orla and Finlay’s on their room, that we realised their initials spelt ‘Of’ (or worse the other way round) and so we had to hang them at an angle, they didn’t seem to mind!
Please check out the rest of the Craft Challenge Participants and see what they made this month!


